

| Availability: | |
|---|---|
| Quantity: | |


LMS612A
Floor for Indoor, Floor for Commercial Spaces, Wall for Indoor, Wall for Commercial Spaces, Wall for Outdoor, Countertop, Table, Stair
600x1200mm, 750x1500mm
Marble
| USAGE | SPECIAL USAGE | |||||
Indoor floor |
WALL |
Countertop |
Facade |
Shower Floor |
Exterior Floor |
Public corridor |
| MATERIA | SPECIAL FEATURES | ||||
Glazed Porcelain |
Colorbody Porcelain |
Customize |
Large Format |
Mosaic / Deco |
Zerotox |
Products Description:
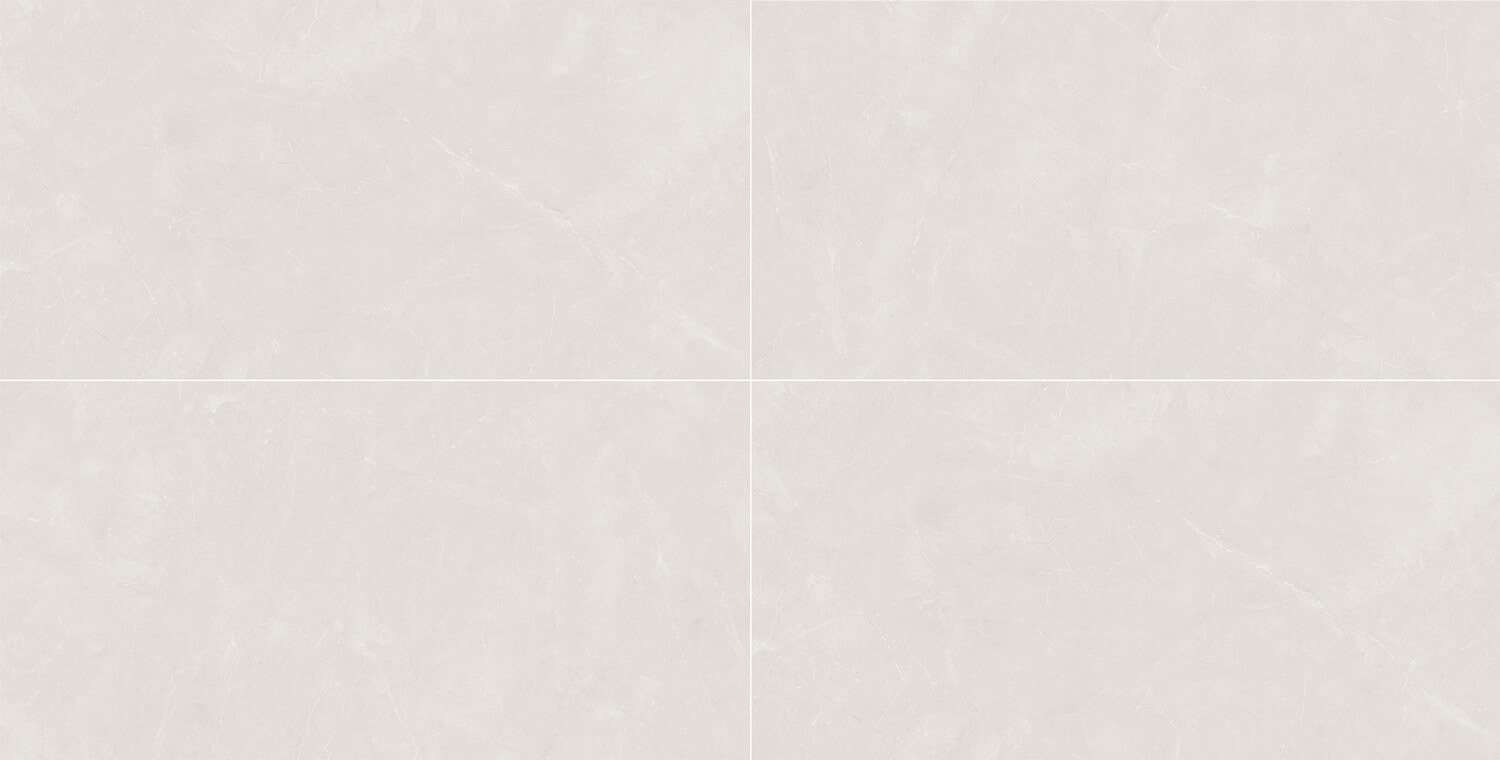
This design is big size rustic tile, we have 600x1200mm and 750x1500mm two sizes. These tiles typically have a textured surface that mimics the natural veining and patterns found in marble. Cream color marble look tiles are a popular choice for those seeking a classic and timeless aesthetic. The cream color adds warmth and brightness to a space, making it feel inviting and elegant. These tiles can be used in various applications, including flooring, walls, showers, and countertops, to create a luxurious and sophisticated look.
Photo:
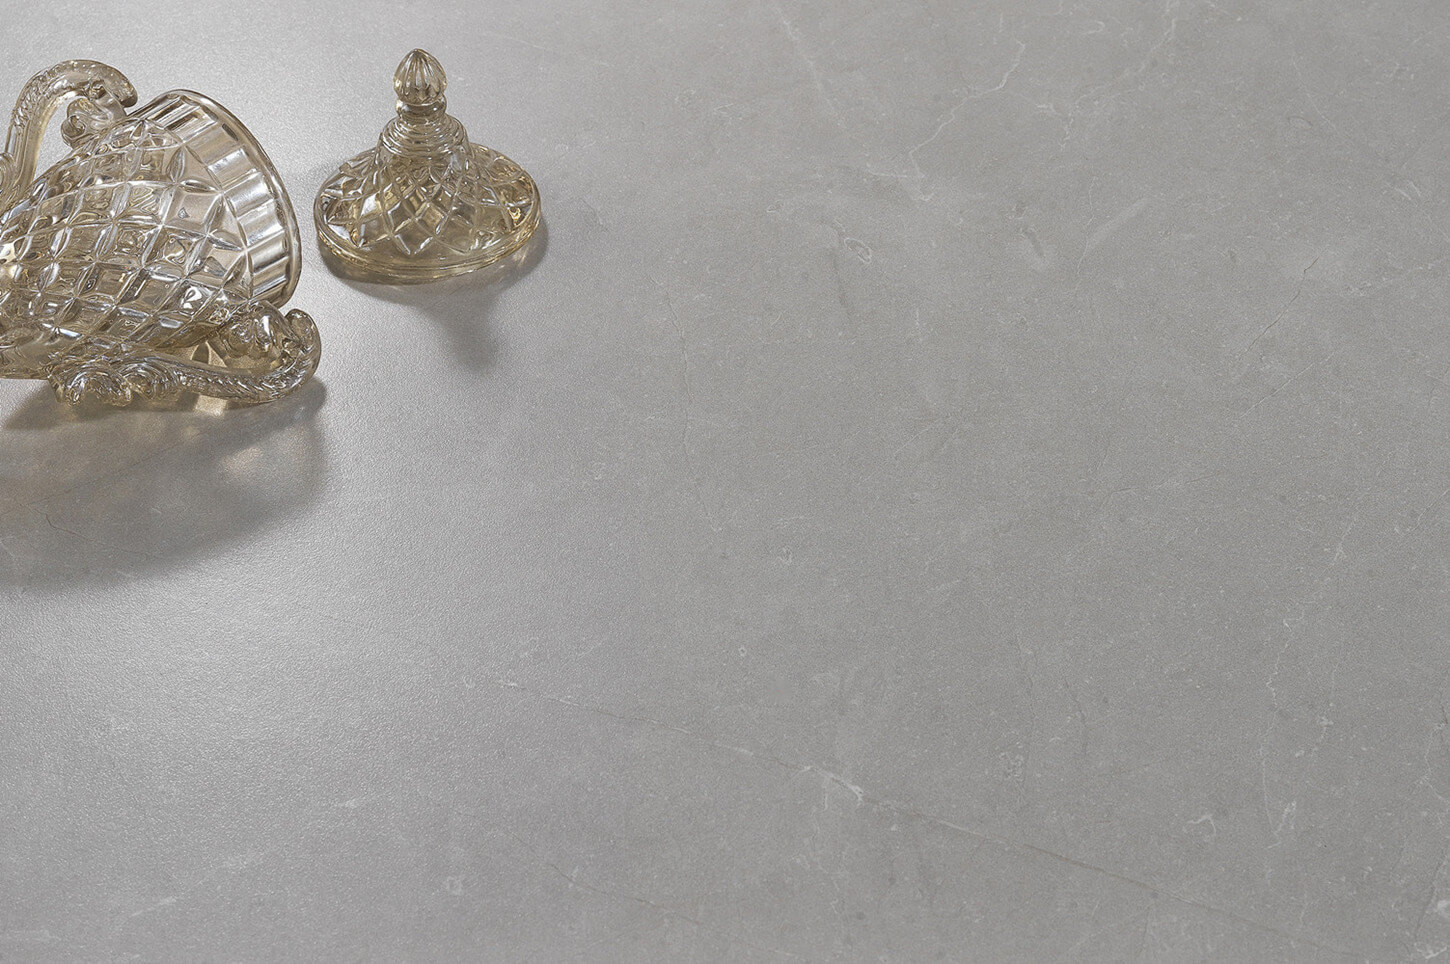
Below is a photo for the real texture in not too light envirement

Features:
Fine glaze matt finish
The shade is akin to a soft cream, with a subtle grain that's not too heavy. Overall, the tone leans towards a creamy hue, sans the yellowish tint, making it a truly gentle color.
Tle laying process key steps:
Preparation, Plan Layout, Apply Adhesive, Tile Laying, Cutting Tiles, Cleaning and Caulking, and Wiping and Maintenance.
First, clear the paving area, ensuring it's level, clean, and obstacle-free. You may also apply a water repellent if desired.
Next, create a tile layout plan based on the paving area's size and shape. Mark the tile positions using tools like pencils and strings.
Then, apply tile glue evenly using a tile glue knife. After that, start laying tiles according to the layout plan, applying adhesive to the tile backs if needed.
Use a rubber mallet to tap them into place. If cutting tiles is required, use a tile cutter or manual tool. Once the glue is dry, clean the tile surface and caulk the gaps between tiles. Finally, wipe the tiles with a damp cloth and maintain them with a tile maintenance agent, if necessary. Understand safety guidelines and choose suitable tools and materials based on your specific situation.
| USAGE | SPECIAL USAGE | |||||
Indoor floor |
WALL |
Countertop |
Facade |
Shower Floor |
Exterior Floor |
Public corridor |
| MATERIA | SPECIAL FEATURES | ||||
Glazed Porcelain |
Colorbody Porcelain |
Customize |
Large Format |
Mosaic / Deco |
Zerotox |
Products Description:
This design is big size rustic tile, we have 600x1200mm and 750x1500mm two sizes. These tiles typically have a textured surface that mimics the natural veining and patterns found in marble. Cream color marble look tiles are a popular choice for those seeking a classic and timeless aesthetic. The cream color adds warmth and brightness to a space, making it feel inviting and elegant. These tiles can be used in various applications, including flooring, walls, showers, and countertops, to create a luxurious and sophisticated look.
Photo:
Below is a photo for the real texture in not too light envirement

Features:
Fine glaze matt finish
The shade is akin to a soft cream, with a subtle grain that's not too heavy. Overall, the tone leans towards a creamy hue, sans the yellowish tint, making it a truly gentle color.
Tle laying process key steps:
Preparation, Plan Layout, Apply Adhesive, Tile Laying, Cutting Tiles, Cleaning and Caulking, and Wiping and Maintenance.
First, clear the paving area, ensuring it's level, clean, and obstacle-free. You may also apply a water repellent if desired.
Next, create a tile layout plan based on the paving area's size and shape. Mark the tile positions using tools like pencils and strings.
Then, apply tile glue evenly using a tile glue knife. After that, start laying tiles according to the layout plan, applying adhesive to the tile backs if needed.
Use a rubber mallet to tap them into place. If cutting tiles is required, use a tile cutter or manual tool. Once the glue is dry, clean the tile surface and caulk the gaps between tiles. Finally, wipe the tiles with a damp cloth and maintain them with a tile maintenance agent, if necessary. Understand safety guidelines and choose suitable tools and materials based on your specific situation.


